
Sharing Revit materials can be tricky, especially among distributed teams in multiple offices. Autodesk requires material assets to be shared using an ADSKLIB file which is essentially a bundle of XML files (along with other files) to help Revit keep track of where the material assets are stored. Like any file that requires a path to be hard-coded, this makes it very difficult to share these assets because it means every user must have access to the file location that the assets are stored. I think it goes without saying that this is a less than ideal situation for a firm who would like to share files over a wide network of users.
The good news is, as of UNIFI 3.2, users have the ability to easily share Revit materials with their entire team (as well as other teams) in the cloud.
Share Revit Materials With UNIFI
By storing Revit materials in UNIFI, you’re granted all of the power to organize them just like any other piece of content such as metatags, multiple libraries, revision history, automatic Revit version upgrades, and star-ratings.
Revit materials really are not like any other piece of content, so there are some additional features that we’ve added which give you improved workflows and visibility of the data associated with this new type of content.
Grouped By Material Class
When browsing your Revit material library in UNIFI, you’ll notice that the materials are grouped by class. These classes can be any custom classes that you’ve defined in a Revit project as they will be exported along with the material. Below is an example of our class we created call “wood”.
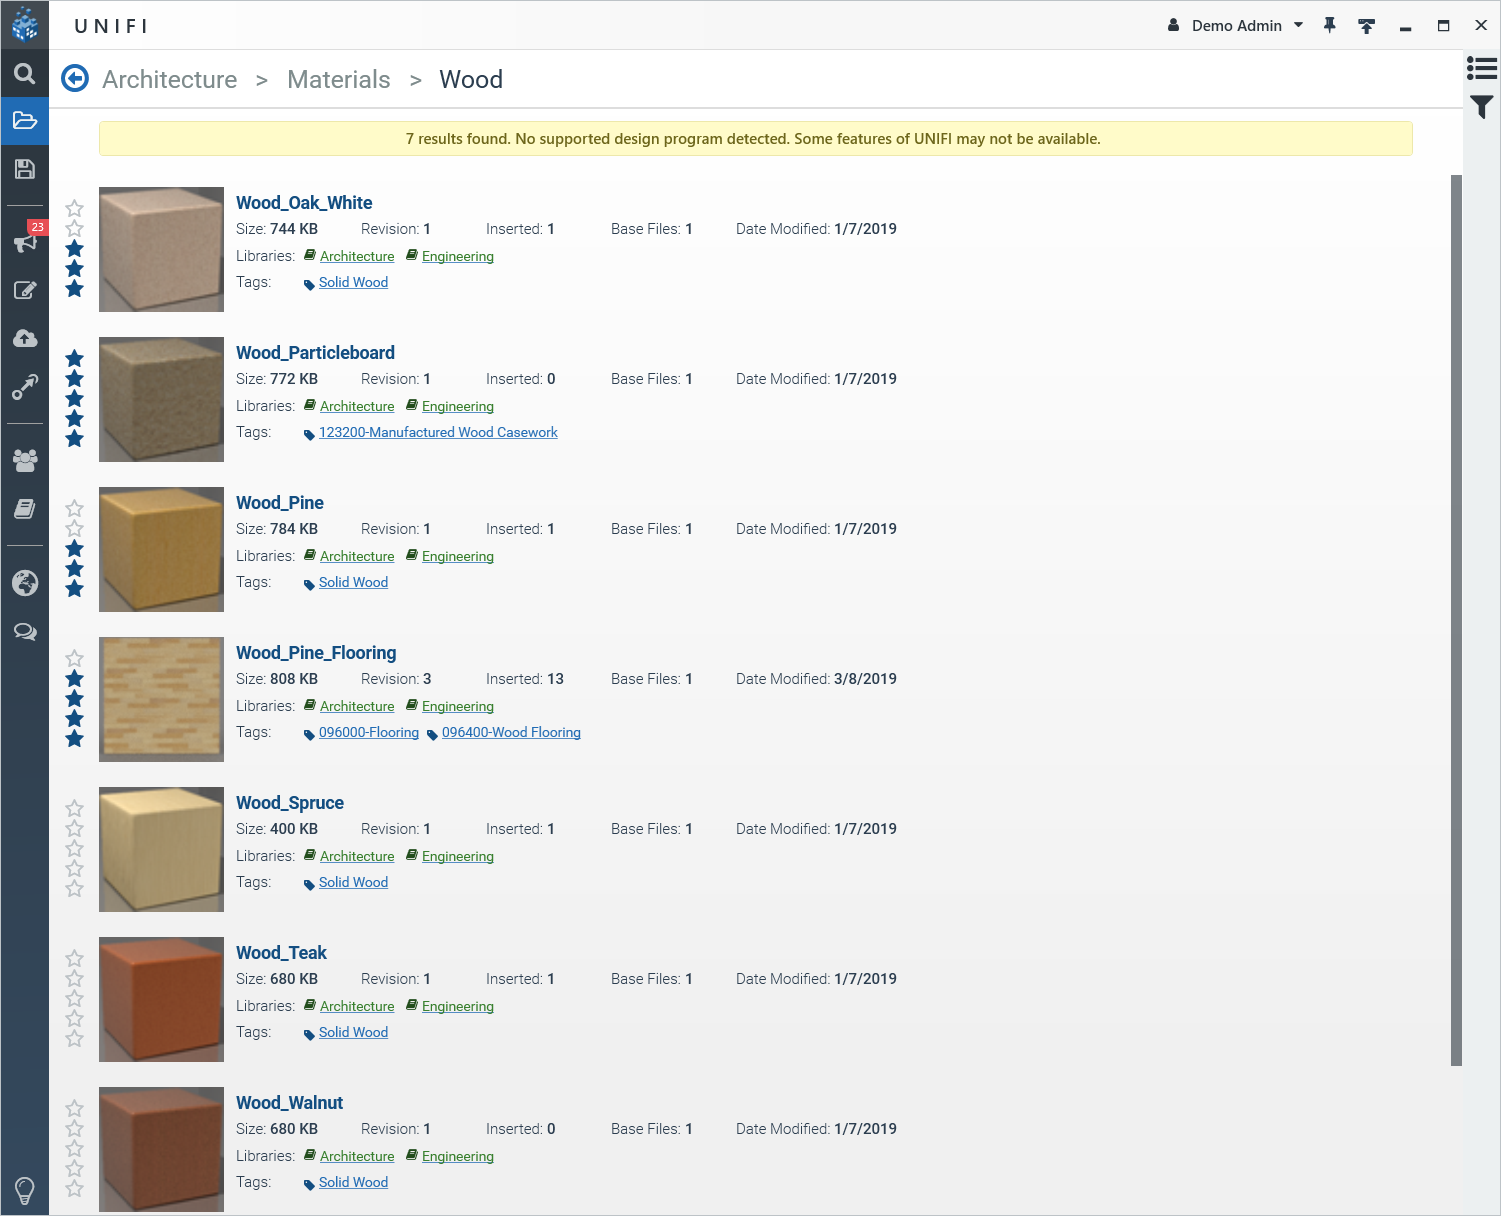
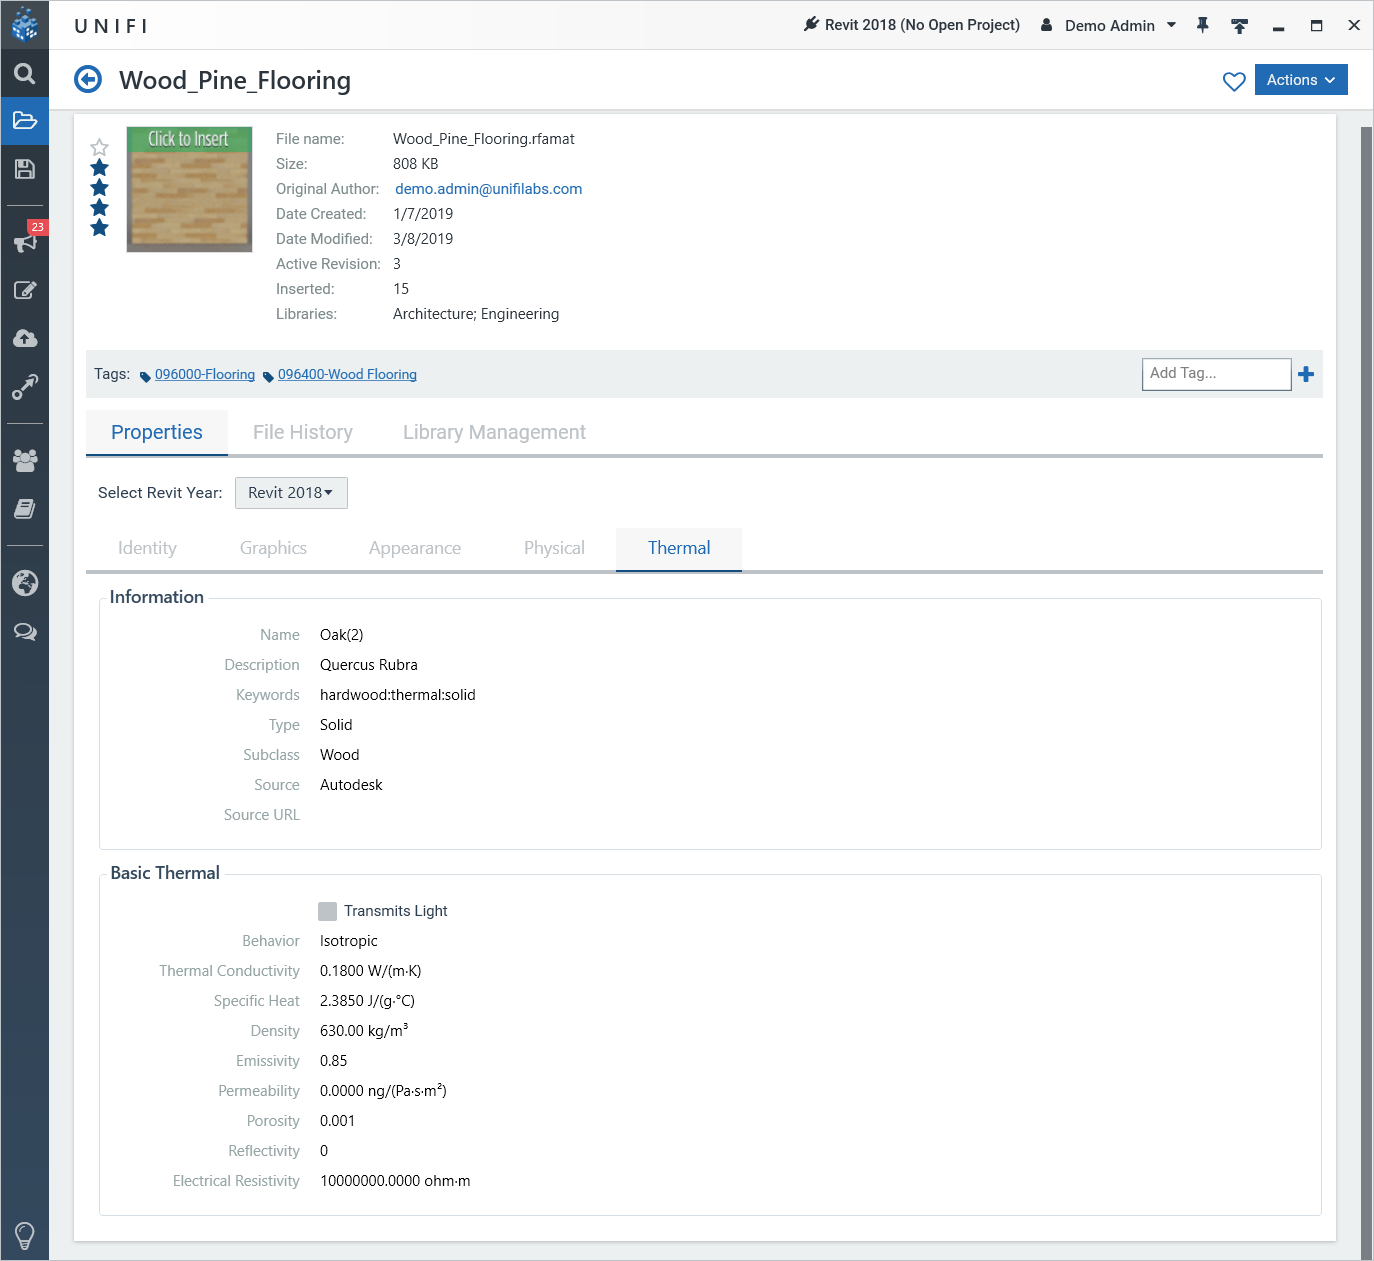
Look at all of that sweet metadata! You now have star-ratings, multiple libraries, revisions, and tags at your disposal to help you manage Revit materials.
Visibility of Revit Material Properties
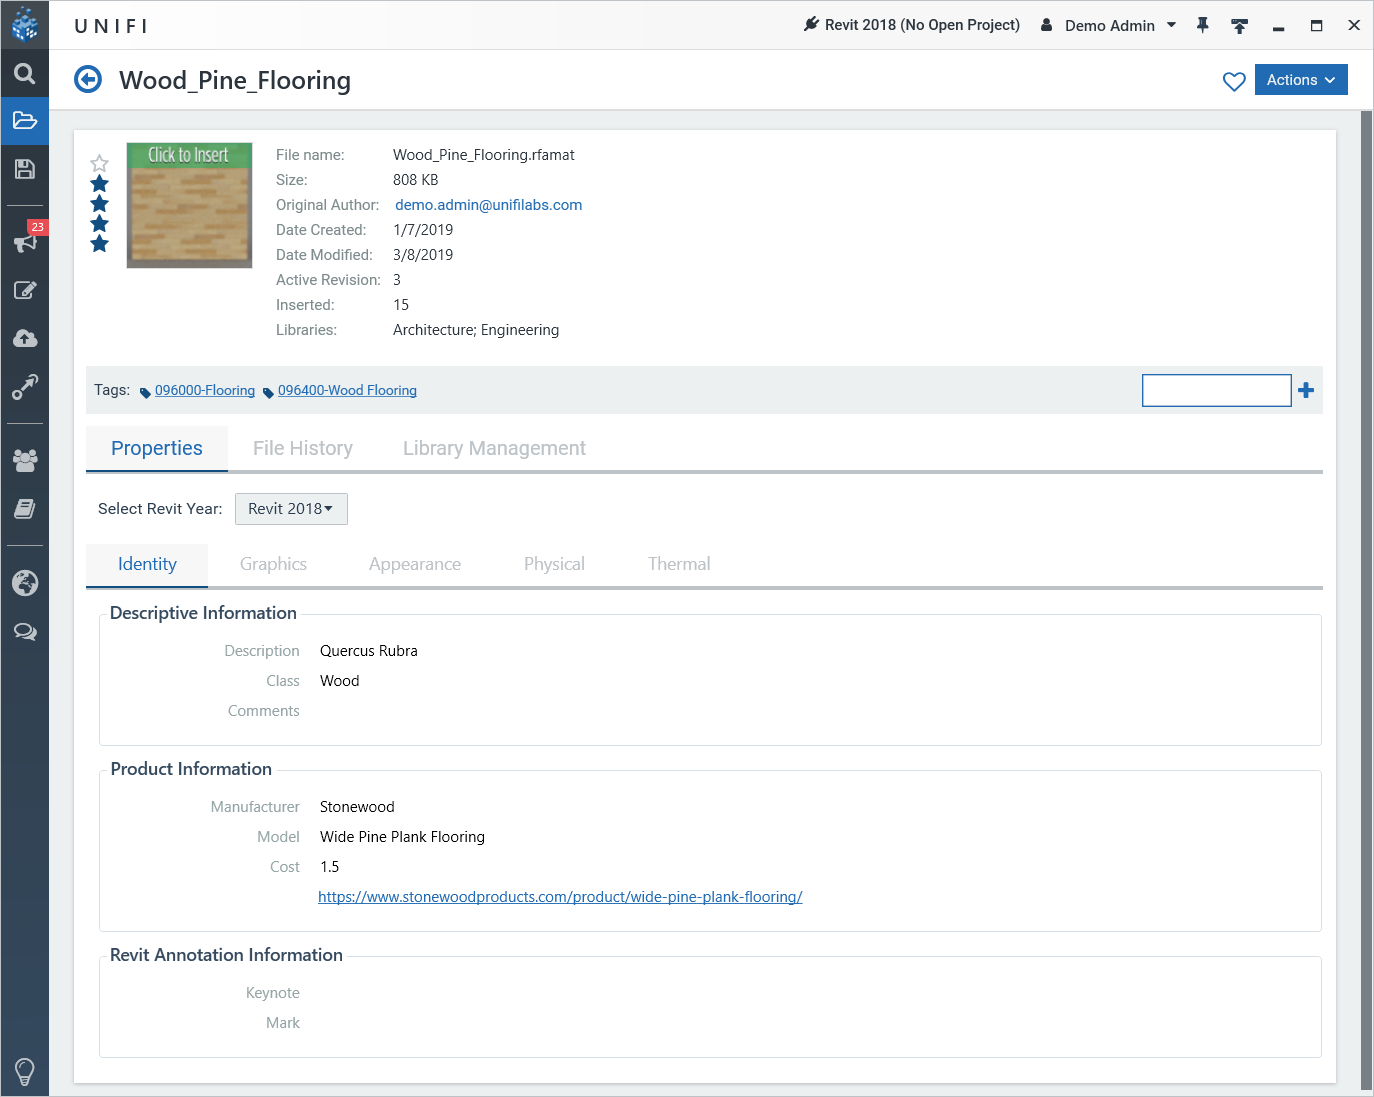
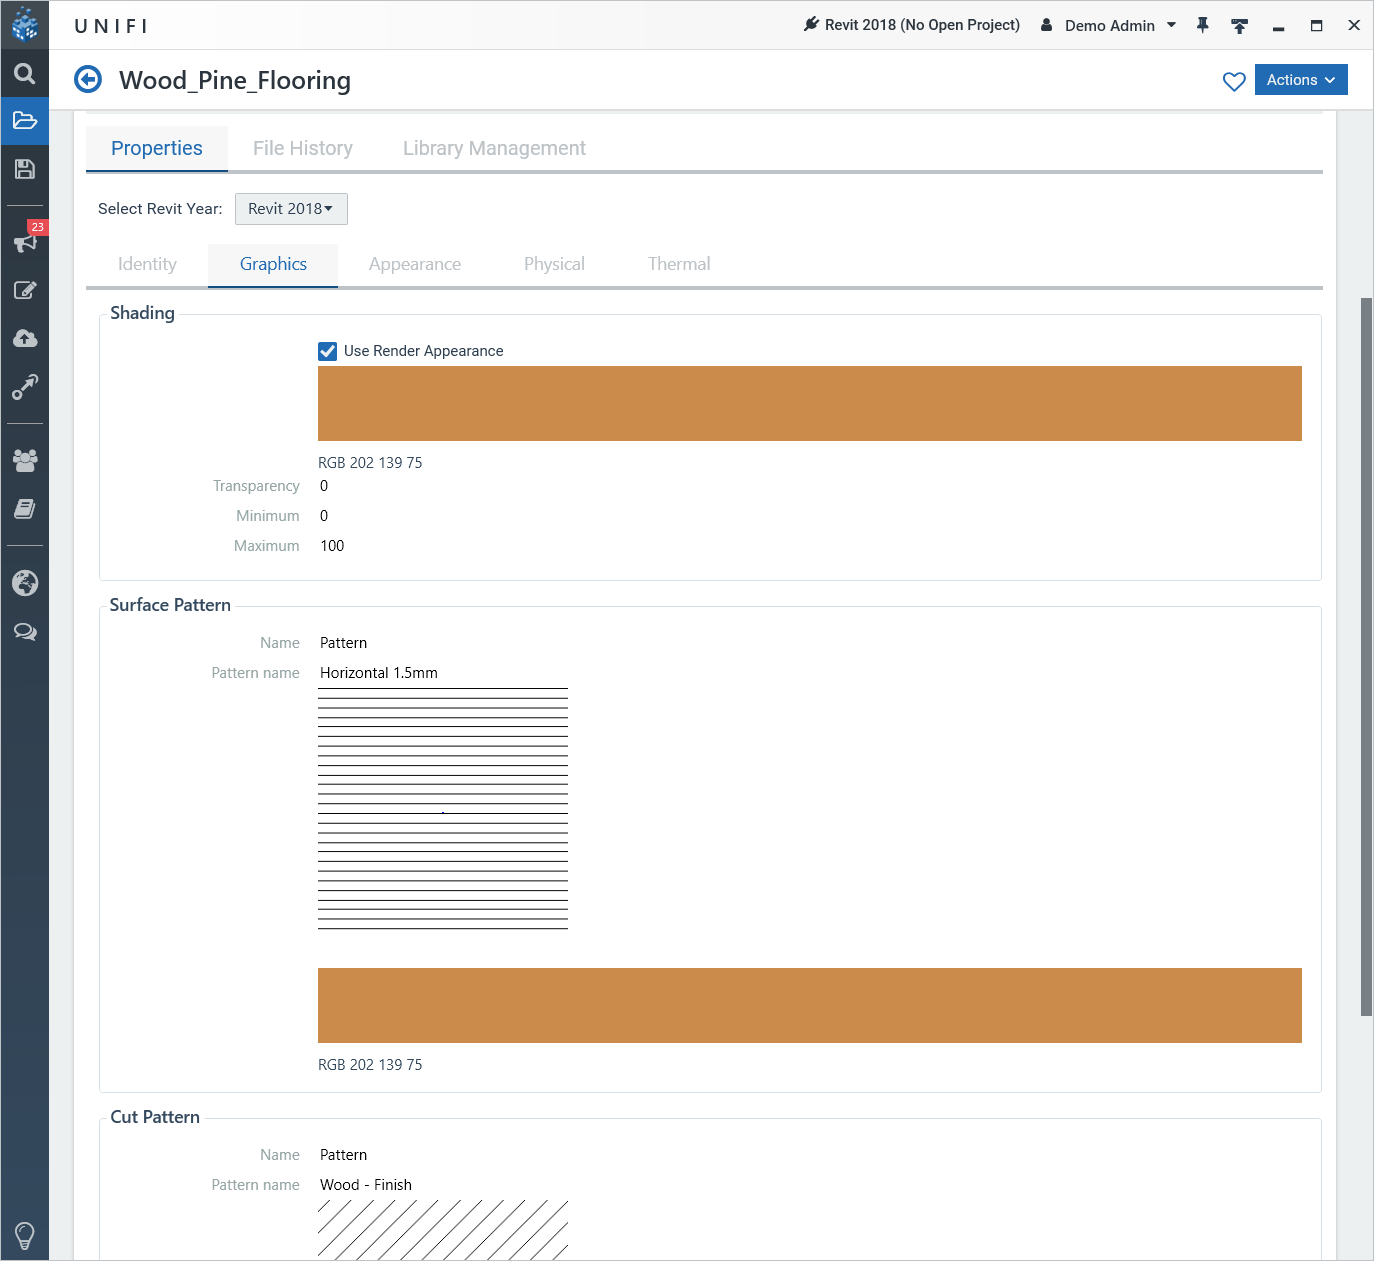
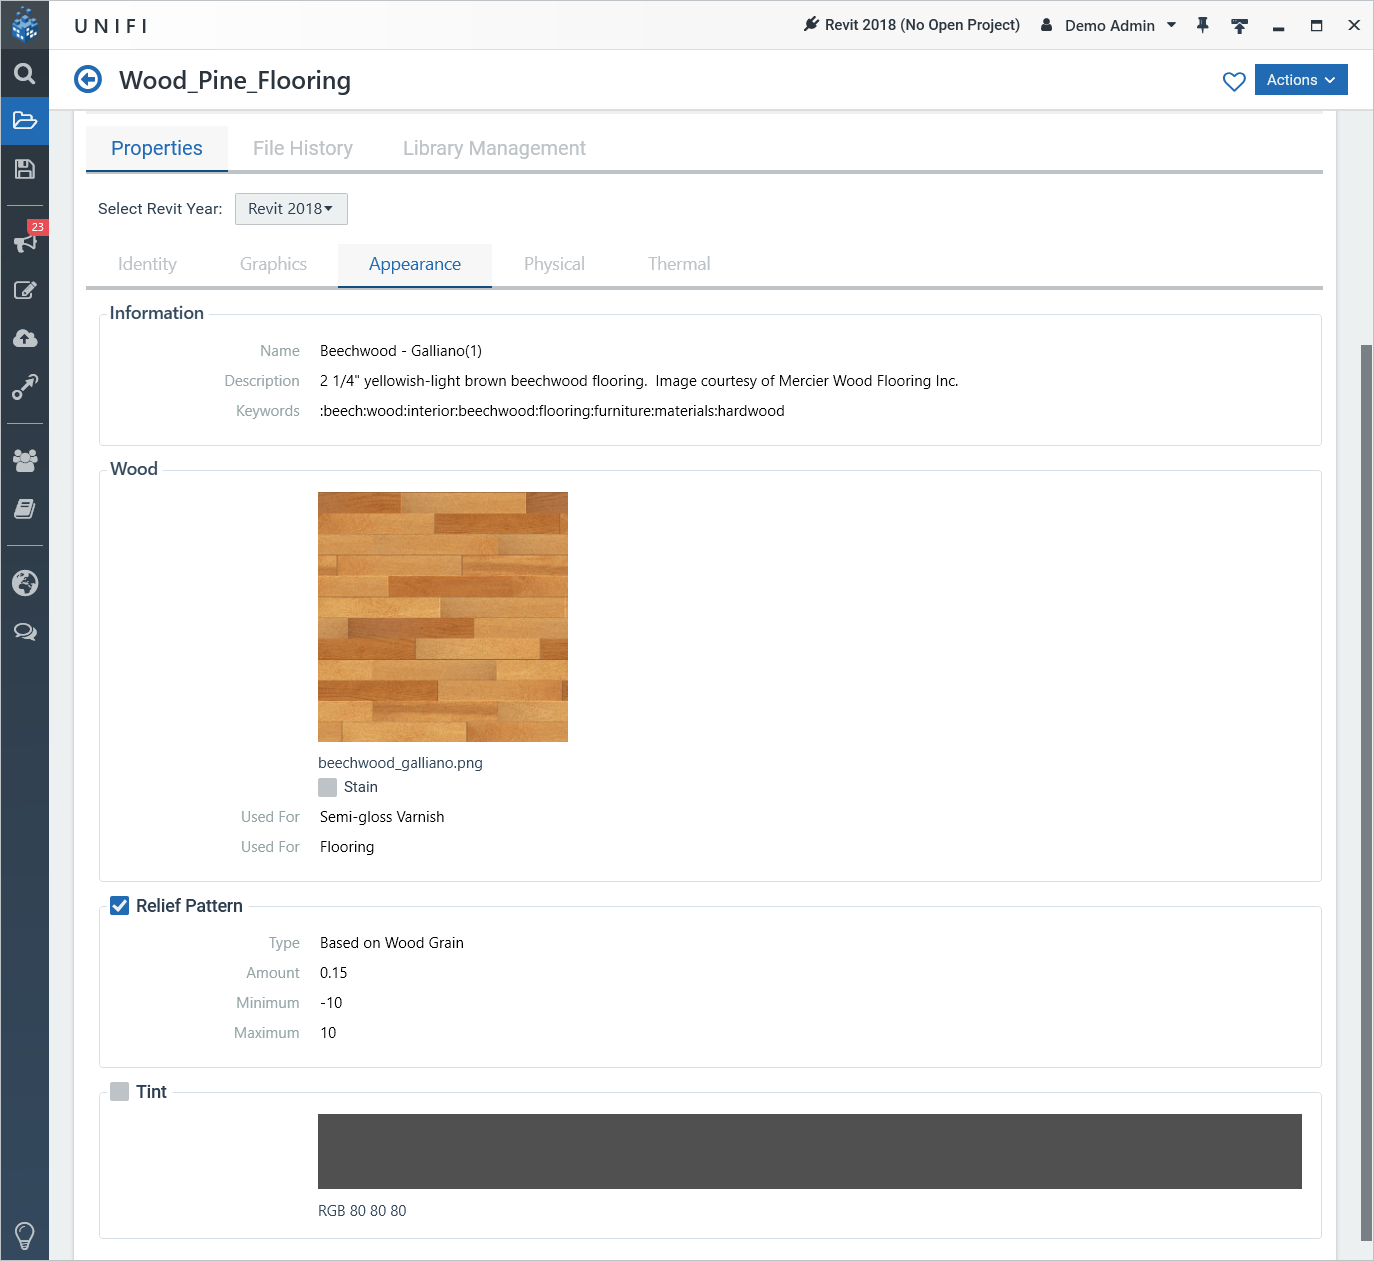
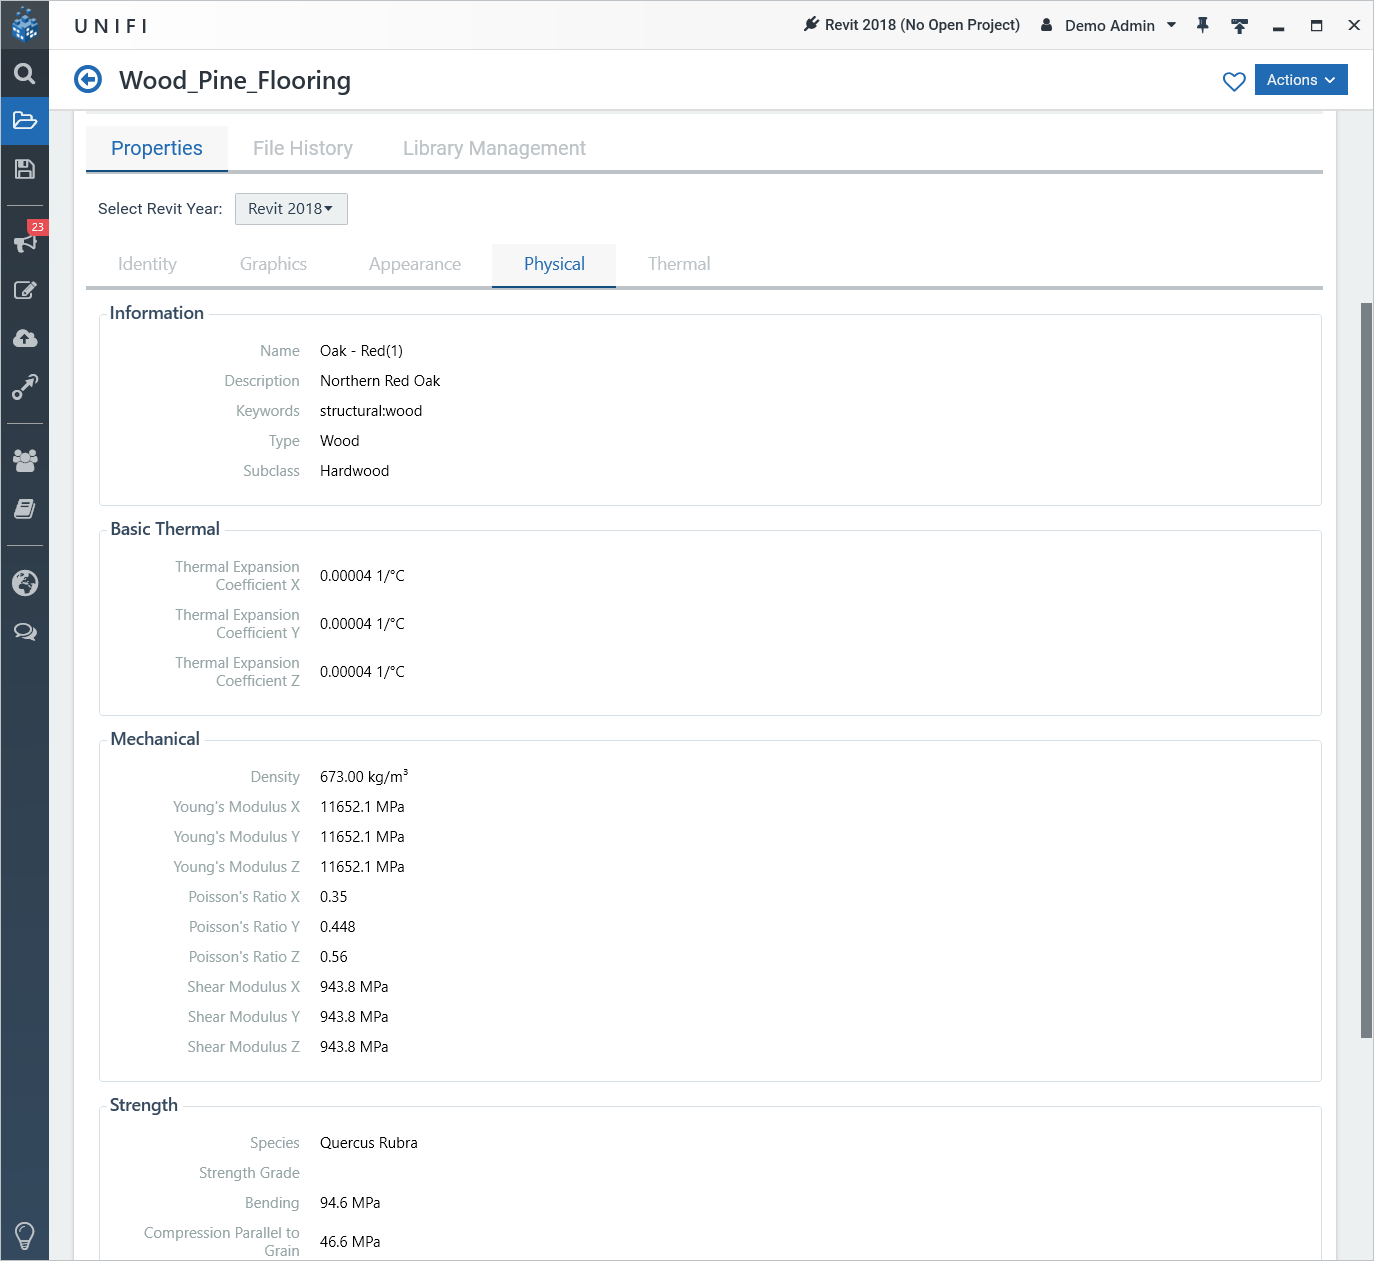
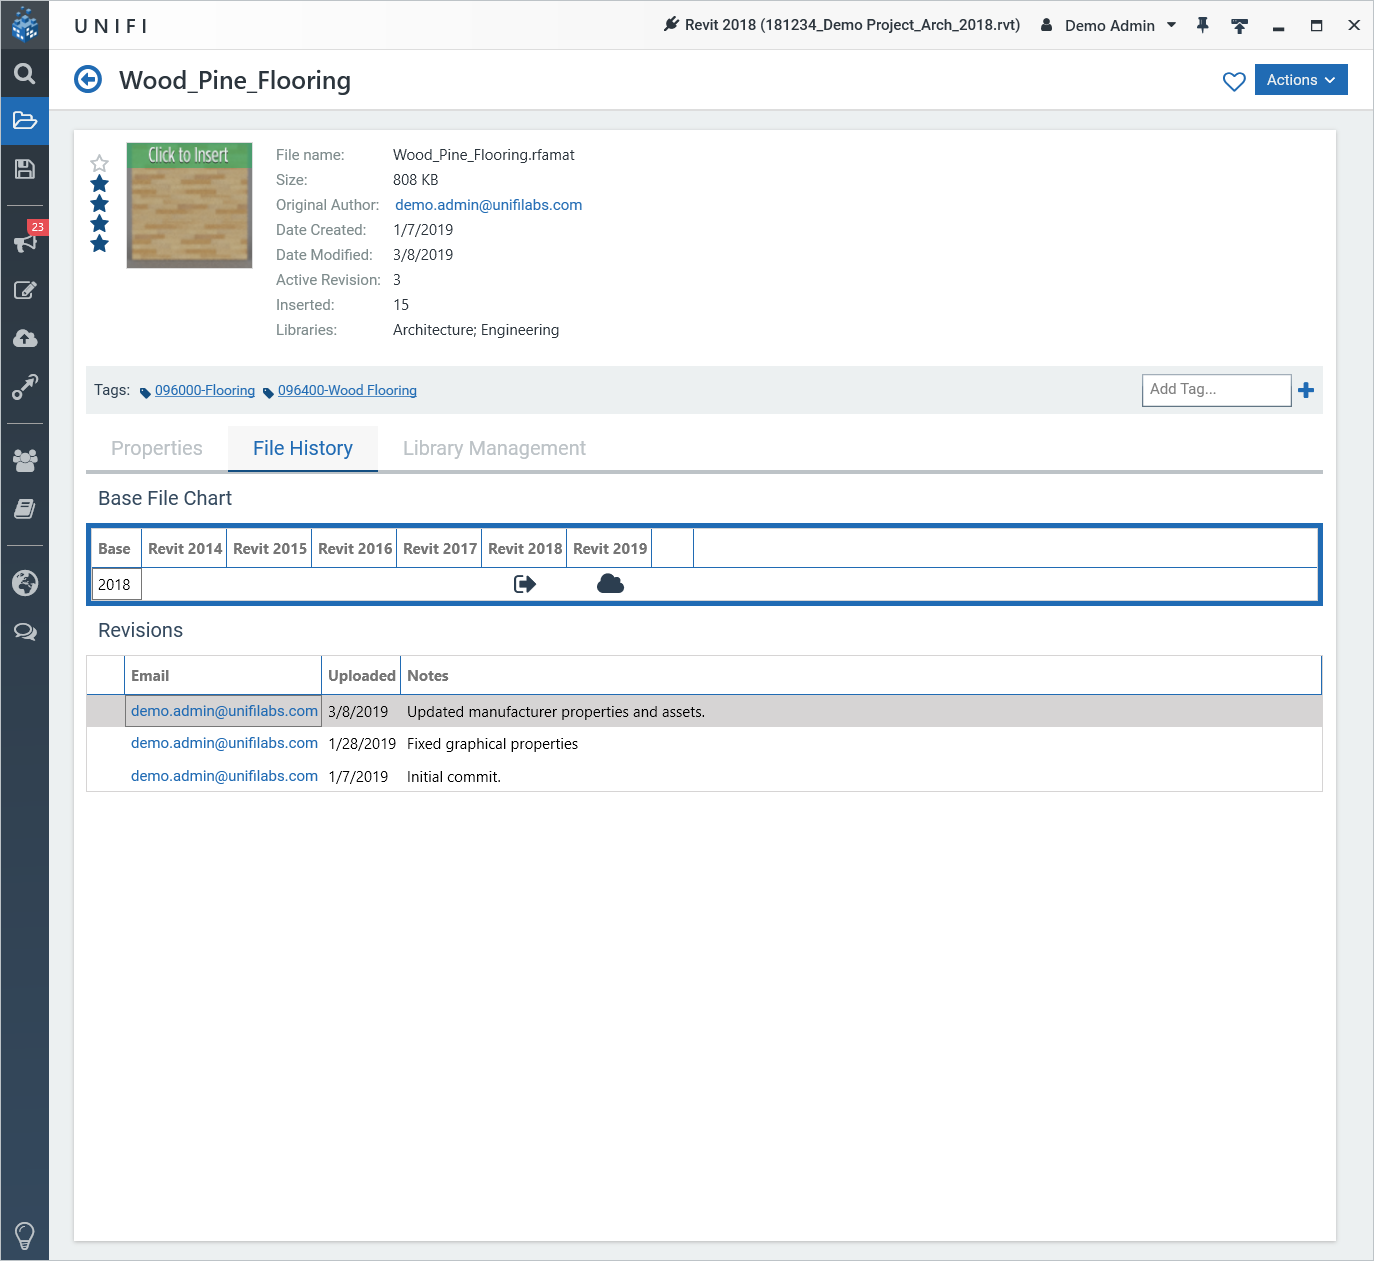
We wouldn’t expect your team to know if a material is what they need for their project simply by looking at the preview image, so visibility of the Revit materials properties directly in UNIFI is a critical component. Drill down into an individual Revit material by clicking on its name and you’ll see the material properties with multiple tabs for you to browse through prior to loading it into your project.
Identity Properties
Appearance Properties
Physical Properties
Thermal Properties
When it comes to managing Revit materials, sharing them in the cloud is only solving half the problem. The other half is interoperability with a Revit project. Luckily, we already have tools implemented which allow you to easily export and import materials into a Revit project.
Exporting Revit Materials to UNIFI
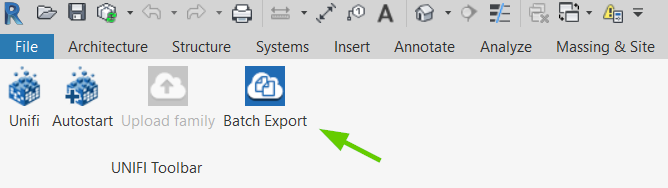
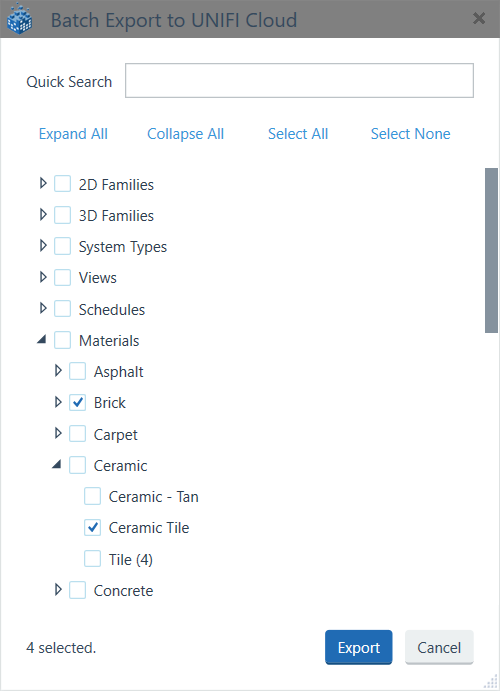
Exporting Revit materials from a Revit project and importing them into your UNIFI libraries is as streamlined as one would expect. Simply use the same Batch Export tool that you would use to export loadable families, system families, schedules, and drafting views. From within a Revit project, navigate to the new “Materials” item in the selection tree which allows you to select entire material classes or individual Revit materials to export to your libraries.
Once uploaded, the Revit materials will be ready to share with the rest of your team, or even external teams, as needed.
Change Management for Revit Materials
UNIFI will track revisions to Revit materials just like any other piece of content. As long as the Revit material has the same name at time of export, UNIFI will automatically create a new revision and track who changed it and when. As always, you’ll also have the option to add a note so the rest of the team knows exactly what changed during each revision.
That right, introducing change management for your Revit material libraries!
Pulling Revit materials out of the cloud and loading them into a project works like any other piece of content in UNIFI. Simply click the preview image from any screen within UNIFI and it will be downloaded from the cloud, loaded into your project, and immediately be ready to paint onto faces.
If you prefer to only load the Revit material into your project so that you can control it parametrically, simply hit the escape key on your keyboard once the material is loaded into your project and the material will still be loaded in and ready to use in your material parameters.
It’s also worth noting that you can also batch load multiple materials into a project by simply selecting multiple materials in UNIFI (CTRL + Click , SHIFT + Click, CTRL+A) and then right-clicking and choosing Batch Insert from the pop-up menu.
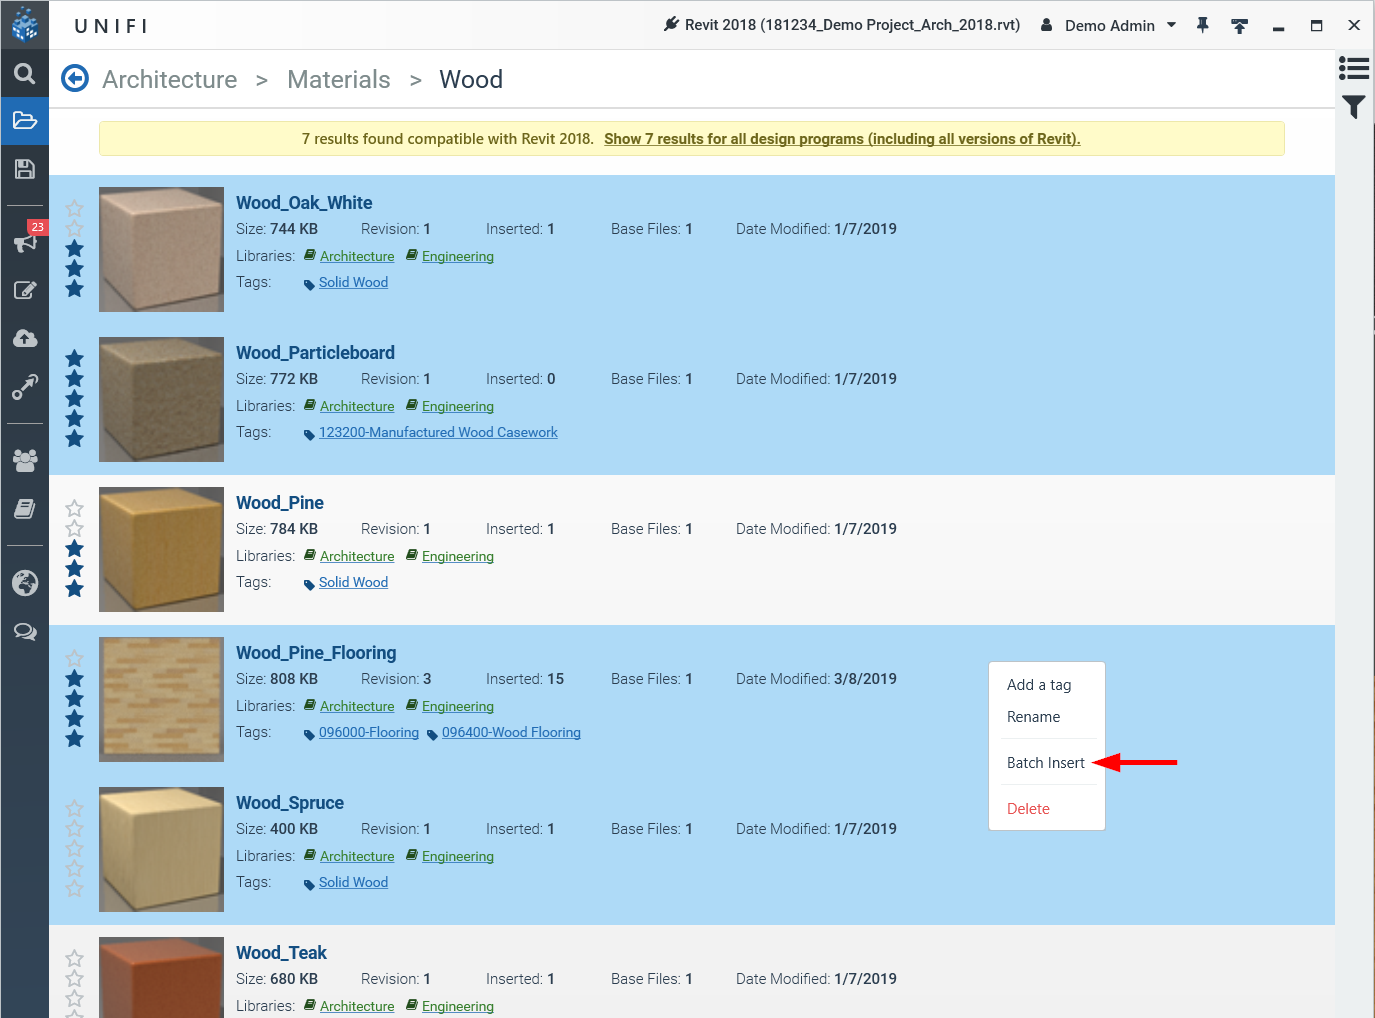
Think about the improved workflows for grouping content by metatag; one would only need to filter by tag, select all, and batch insert to load an entire library of materials into their Revit project.
Your Revit Material Library in The Cloud
We hope this new feature will improve the way your firm manages and shares Revit material libraries by providing additional metadata and version control through our platform. If you’ve been struggling with managing Revit materials with your team, try sharing them in the cloud with UNIFI.