
It’s a common workflow for designers to turn to Sketchup during the early phases of a building design because jumping straight into Revit model is often more time consuming. In this post, we will cover the less common workflow of going from Revit to Sketchup and discuss some recommended techniques and some common errors to watch out for.
In part one, we’ll cover the process from the Revit side of the workflow, where you will prep your model for export.
1. Prep Your Revit Model
On the surface, it can seem fairly simple to export Revit to Sketchup, but here are some techniques that should make your life a little easier before importing to Sketchup.
Model Lines for Reference
I highly recommend that you draw a set of model lines around your Revit model to use as a reference after imported to Sketchup. As shown later in this tutorial, it can be difficult to align the multiple models in Sketchup without these lines to snap to.
Export Models by Model Category
Another technique that can help when exporting Revit to Sketchup is to export multiple models which contain a few model categories rather than one model containing all model categories. Although Sketchup maintains layers for visibility, it is still much easier to manage when individual models contain a common model category.
In the screenshot to the right, you can see that I’ve created an individual 3D view for Doors, Roofs, Walls and Windows, however the view named “Export – Site” actually has the Parking, Planting, and  Topography model categories set to visible because for this project, it makes sense to have all site elements in one exported model.
There are a number of ways to control visibility in Revit, so I’ll leave it up to you to decide what works best for you.
2. Export from Revit
Now that you have your model prepped, you are ready to export your 3D views as individual model as the next step in transitioning from Revit to Sketchup.
Export to DWG
Within Revit, navigate to the File menu and choose Export > CAD Formats > DWG.
In this DWG Export window, you are presented with several options including the option to select multiple views to be exported in batch. If you don’t see the 3D views that you created in step one, you might need to change the Export dropdown to and the Show in list dropdown to Views in Model as shown in the screenshot below. Once the relevant views are displayed, simply check the box under the Include column to select the 3D views to be exported from Revit to Sketchup.

AutoCAD DWG Version
One important detail that often gets overlooked when transitioning your model from Revit to Sketchup is the DWG file version. Sketchup typically doesn’t support newer versions of CAD file types, so you’ll want to make sure you have a compatible version of the AutoCAD DWG after export.
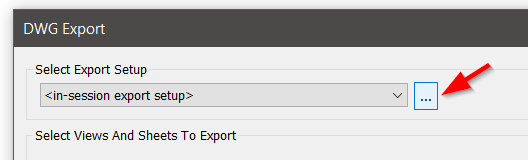
To change this setting, click the Modify Export Setup button. It is the obscure ellipsis button in the Select Export Setup section of the DWG Export window (see screenshot below).
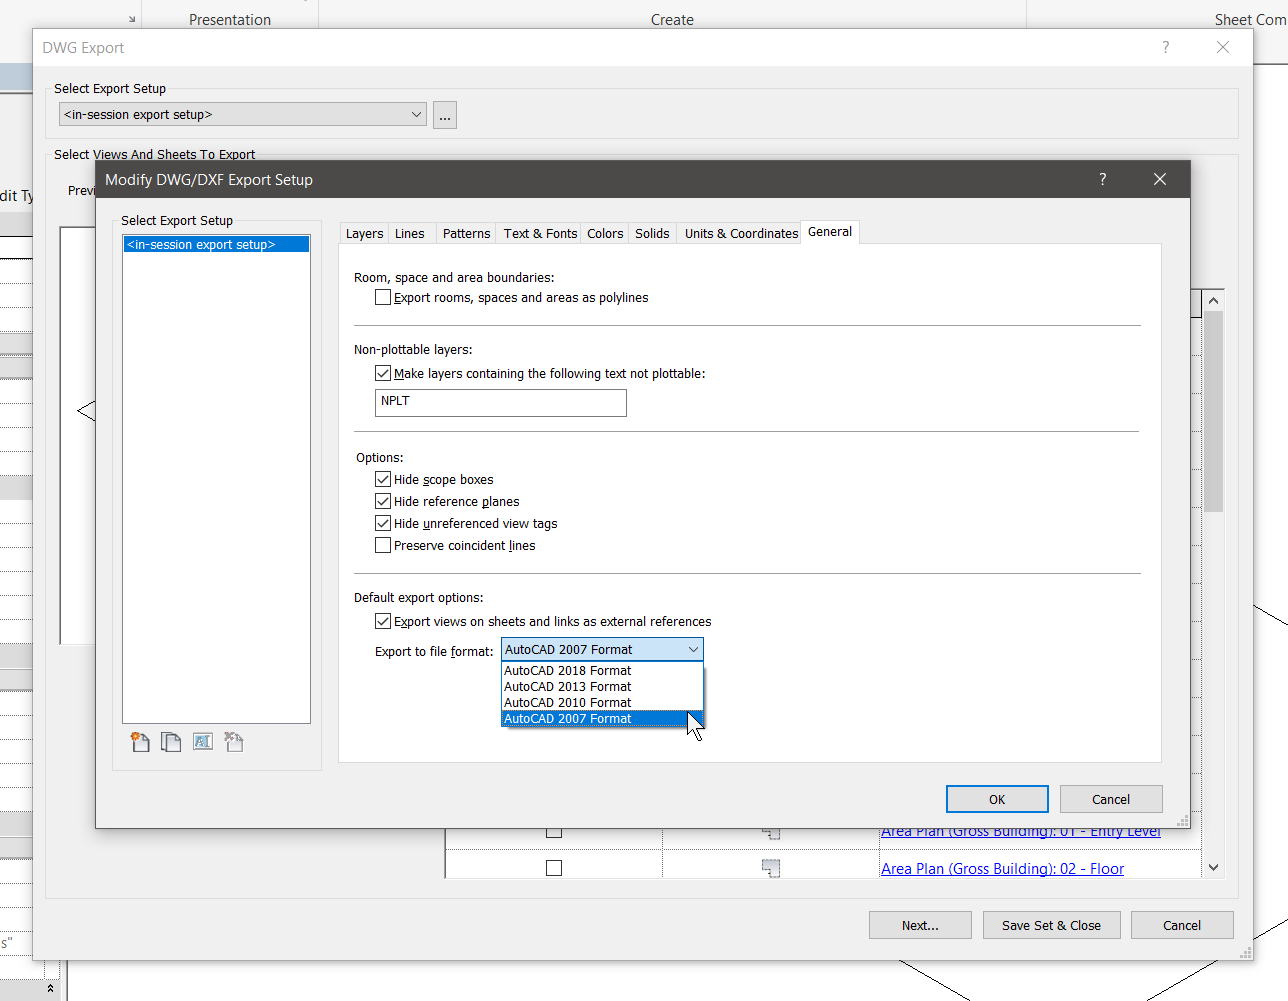
In the Modify DWG/DXF Export Setup window, I typically change the “Export to file format” way back to AutoCAD 2007 Format. This way you’ll be sure that it is compatible with most current versions of Sketchup.
Now that you’ve adjusted all of your settings, you are ready to export. Click the Next button in the DWG Export window. You will then be prompted to save the DWG files. Browse to an appropriate target folder location to save the files.
Conclusion
Now that you have successfully exported your CAD files, you are ready to complete the process of converting your model from Revit to Sketchup. Click here to learn how to do this in part 2.